
Menu
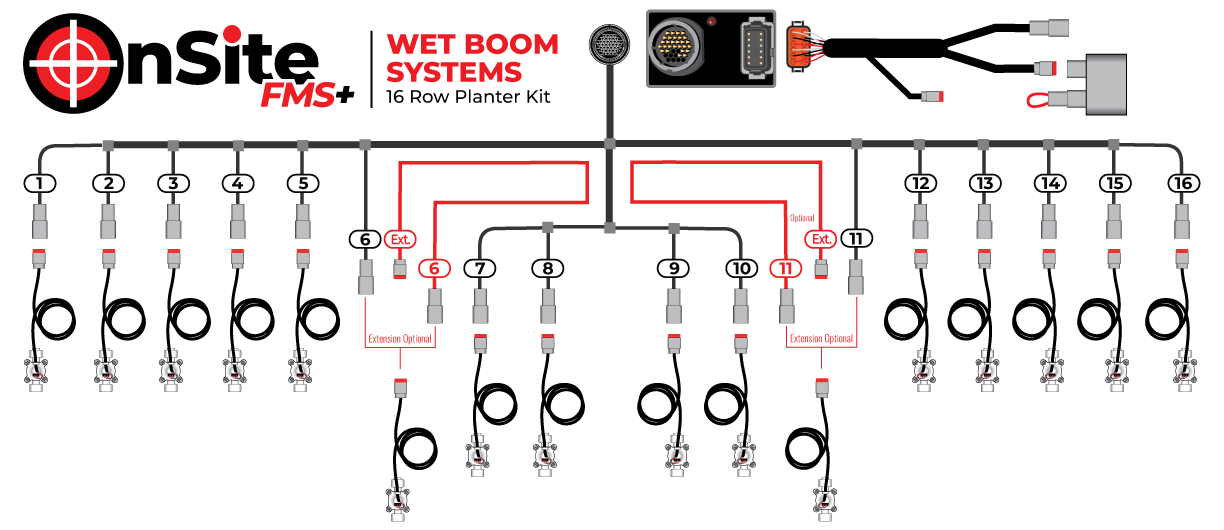
Wet boom planters use a hard pipe (or boom) to move the liquid down the planter to the row units. Because there is a long boom instead of a central manifold, we just mount the flowmeters out near the row units themselves and run a much longer wire harness to each of the flowmeters.
Our standard kits can also be used on wet boom planters, but you will have to run hoses to the row units instead of the wire harness, just like a normal dry boom planter.
Easy Installation in Five Steps
For wet boom planters, we eliminate the flowboards and add the flowmeters in-line right before your row unit. This is still a very simple install, but does require a much larger Flowmeter Harness that reaches out end-to-end on your planter.
To install the flowmeters, find a spot in the flexible line between the wet boom and the nozzle body where you want to add your flowmeter and cut your hose. Your flowmeter will go right in-line where you cut. Your kit will have barbed fittings on both sides of the flowmeter that insert into hose in the splice you just cut. Secure the flowmeter to the planter with zip ties and plug in your Flowmeter Harness. The Flowmeter Harness usually just follows the wet boom, making installation simple.
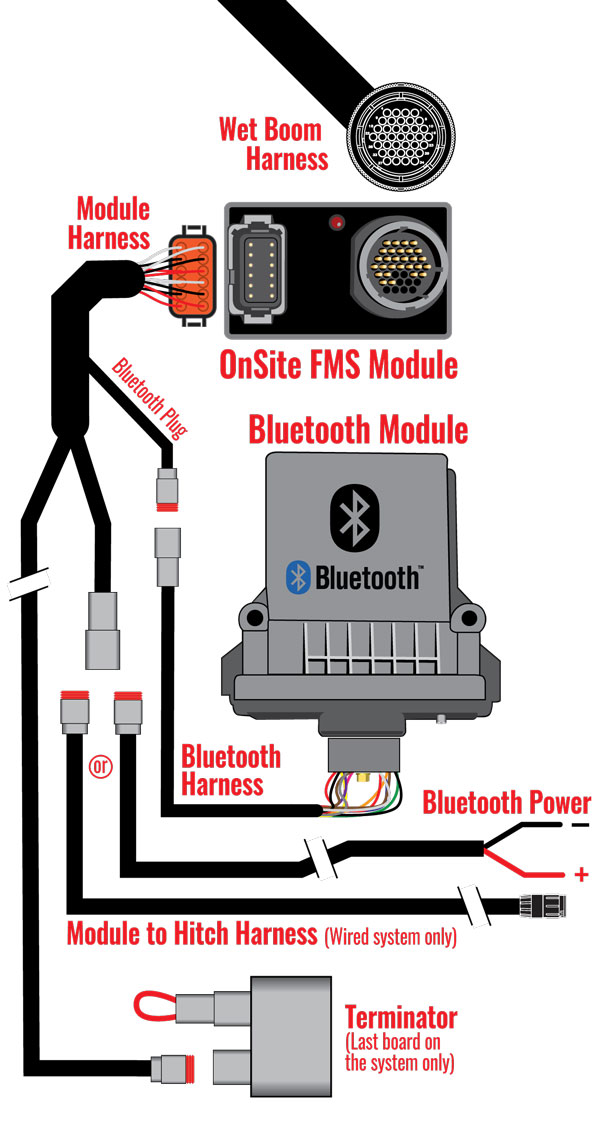
If your planter has more than 24 rows, you will have multiple OnSite Modules that must be connected together in a daisy-chain configuration. A Module Connection Harness. is included with your kit and are sized to fit your model of planter. The last module in the chain will get a terminator at the end. The system will automatically detect all your modules. You can’t hook them up wrong!
The included Display Kit comes with your 7″ touchscreen display with charging cradle, a genuine RAM Mount and the Power Harness. To install, just screw the adjustable RAM mount into the tractor, attach the cradle, and drop in your display. The power harness attaches to the cradle and can be run to almost any power 12 volt 30 amp source that is convenient (though we recommend connecting to the battery).
KNOW YOUR FLOW ON EVERY ROW